Nearly 30% of a home’s heat loss happens through windows. This is a surprising fact. It shows how upgrading windows can quickly change your bills and comfort.
In Vancouver, Richmond, Surrey, Burnaby, and Coquitlam, many wonder about professional window installation. Robertson Windows, using Vinyltek products, has a clear process. It starts with a personalized consultation and ends with careful installation.
Installers will look at product choices and discuss energy performance. They will also confirm schedules before they start. This is important for those planning to replace windows across Canada.
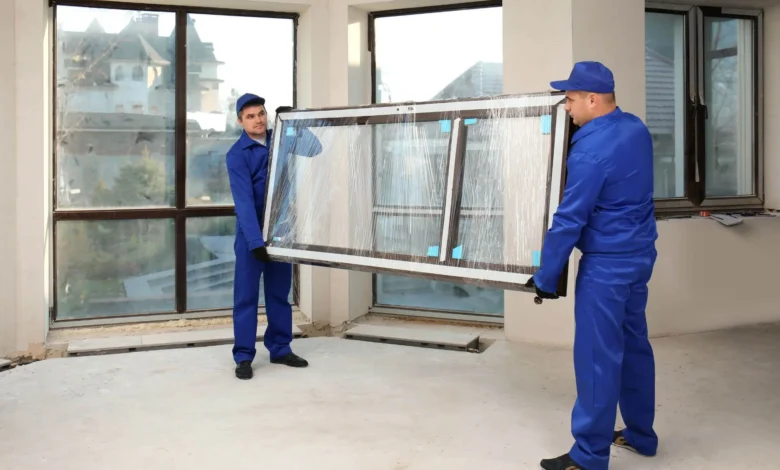
The team will protect your floors and furniture. They will remove old units, prepare openings, and install the new windows. They make sure everything is sealed and insulated properly.


After the installation, they make final adjustments and clean up. They also explain the warranties from the manufacturer and installer. This way, homeowners know how to take care of their new windows.
Why a Professional Window Installation Matters for Canadian Homes
A skilled installation is key for new windows to perform well over time. It ensures a proper fit, precise leveling, and careful sealing. This keeps your home tight against wind and cold.
Such attention helps energy-efficient windows meet their rated performance. Homeowners then see real benefits, not just labels.
Energy efficiency and cost savings
Choosing the right U-factor and SHGC is important in Canadian climates. A lower U-factor means less heat loss in winter. The correct SHGC controls solar heat gain in summer.
When installers measure accurately and seal gaps, families save on heating bills. They also lower long-term energy use.
Improved comfort and indoor air quality
Drafts and moisture intrusion harm comfort and air quality. Professionals use foam or batt insulation and exterior caulking. This preserves the airtight installation that keeps warm air inside.
Less air leakage means fewer cold spots and reduced condensation. This creates a healthier living space.
Security, durability, and curb appeal
Modern frames like vinyl, fiberglass, and aluminum perform well when installed correctly. Proper anchoring and hardware upgrades enhance security and extend service life.
Clean trim and accurate finishing boost curb appeal. They also protect resale value. Manufacturer and installer warranties cover defects and weather damage.
Preparing for the Project: What homeowners should do before installers arrive
Having a plan makes installation day go smoothly. Homeowners should pick their options, check the installation schedule with the contractor, and see if they need building permits in Canada. A simple checklist helps everyone know where to park, access points, and the crew’s schedule.
Interior access and clearing the workspace
Installers need easy access inside to measure and work. Homeowners should move furniture away from windows and clear small items. This helps the crew work fast and avoid damage.
Use drop cloths or rosin paper to protect floors where installers will walk. Pull curtains and blinds back so measurements are right and the team can see trim and jambs. If areas like bedrooms or living rooms will be affected, plan a spot for daily items.
Exterior access and landscaping considerations
Getting to the exterior safely is key for quick installation. Trim shrubs, tie back branches, and move patio furniture for ladders and scaffolding. Small changes like trimming shrubs or removing pots can save time and avoid delays.
Make sure driveways and access routes are clear for vans and equipment. If windows are high up, secure pets and plan for coverings on decks or porches to protect surfaces during work.
Scheduling, communication, and permits
Good communication keeps the project on track. Confirm arrival times, work hours, and contact details for the crew. Clear instructions on parking and where to store removed materials prevent confusion.
Check who will get the building permits Canada needs. Many contractors handle permits, but homeowners should confirm this before installation day. A signed estimate and a final check on the schedule prevent surprises.
| Task | Why it matters | Recommended action |
| Clear furniture | Provides unobstructed workspace for measurements and installation | Move sofas, dressers, and small items at least 3 feet from the window opening |
| Protect flooring | Prevents scratches, dust, and adhesive stains during work | Lay down drop cloths or rosin paper along walk paths and work areas |
| Exterior access | Allows safe placement of ladders, scaffolding, and materials | Trim shrubs, remove planters, and clear driveway access before arrival |
| Trimming shrubs | Reduces obstruction and protects plants from damage | Prune branches away from openings and tie back flexible growth |
| Installation scheduling | Keeps crews coordinated and minimizes homeowner disruption | Confirm dates, arrival windows, and daily work hours in writing |
| Building permits Canada | Ensures compliance with local codes and avoids fines | Ask contractor if they will pull permits or check municipal requirements |
What to Expect During the Window Installation Process
A professional window project follows clear steps. Homeowners know what to expect. The crew starts with a quick walkthrough and checks measurements and safety plans.
Personalized consultation and accurate measurements
The in-home consultation includes precise measuring of each opening. Installers check the rough opening, frame depth, and energy ratings. This ensures the team can install new windows without guesswork.
Protecting the home and safety practices
Crews lay down drop cloths and floor runners to shield flooring and furniture. Technicians wear protective gear and secure ladders and scaffolding. These safety measures keep everyone safe while work proceeds.
Removal of old windows and prepping openings
The team will remove old windows carefully. They inspect the opening for rot or damage and make necessary repairs. This prep prevents issues when installing new windows.
Setting, leveling, and fastening the new units
Installers place the new unit and check window leveling. They shim as needed. Proper window leveling is critical to smooth operation. Technicians then fasten the unit securely to the structure.
Sealing, insulating, and weatherproofing
Gaps around the frame receive insulation. Flashing gets applied at critical seams and roofing interfaces. Exterior caulking seals joints to prevent drafts and leaks.
Final adjustments, trim, and finishing touches
Technicians test operable parts and adjust hardware. Interior and exterior trim installation follows. Any necessary paint or sealant is applied to match the home.
Clean-up and site restoration
Crews remove debris, old window parts, and leftover materials. They vacuum and wipe down the work area. Repaired surfaces and landscaping are restored to order.
| Step | What Happens | Why It Matters |
| Consultation & Measurement | Confirm style, material, and precise opening sizes | Prevents fit issues and sets energy performance expectations |
| Protection & Safety | Protect floors, furnishings, and use safety gear | Reduces damage and keeps crew and occupants safe |
| Remove Old Windows | Detach sash, frame, trim; inspect and repair opening | Ensures a solid base for the new unit |
| Set & Level | Place unit, perform window leveling, and fasten | Ensures proper operation and long-term performance |
| Seal & Insulate | Apply insulation, flashing, and caulking | Prevents water infiltration and improves efficiency |
| Trim Installation & Adjust | Install interior/exterior trim and adjust hardware | Completes appearance and ensures smooth function |
| Clean-up & Restoration | Remove debris, clean surfaces, restore landscaping | Leaves the home ready for daily life |
Timeframe and Cost Factors for Window Installation
Planning ahead helps avoid stress and surprises. The time it takes to install windows varies. Knowing what affects the schedule and cost makes decisions easier.
Typical time per window and project duration
Full-frame installation for one window takes 6–8 hours. This involves removing the old sash and frame and installing a new one. Insert or pocket replacements take 1–2 hours if the frame is good.
Crews usually install most windows in a few days. They then finish interior trim, painting, and details on later days. Larger projects might take a week, depending on access, weather, and crew size.
Factors that influence cost
The cost of new windows depends on size, style, and material. Vinyl windows are often cheaper than wood or fiberglass. Double-pane or triple-pane glass and low-E coatings increase cost but improve efficiency.
Custom windows are pricier for unique shapes or bespoke frames. Structural work, like enlarging openings or repairing rot, also raises costs. Remote access, scaffolding, and permit fees add to the cost per window.
Quote practices and avoiding surprises
Companies may offer fixed quotes or hourly billing. Fixed quotes are clearer when the project details are known. Hourly billing is fair for unexpected repairs but is less predictable.
Request in-home estimates and written breakdowns. Ask for details on materials, labor, cleanup, warranties, and permits. Clear scope and written terms help avoid surprise charges.
| Item | Typical Range (CAD) | Time Impact |
| Standard insert window | $300–$800 per-window installation cost | 1–2 hours |
| Full-frame replacement | $600–$1,500 per-window installation cost | 6–8 hours |
| Custom or architect windows | $1,200–$5,000 custom windows price | Variable; often longer lead and install times |
| Structural repairs or rot remediation | $200–$1,200 extra | Adds hours to days |
| High-performance glazing (triple-pane, low-E) | $150–$600 extra per window | Minimal install time change; increases material cost |
When comparing bids, consider warranty terms and installer reputation. Planning well shortens installation time and keeps costs in check.
Warranties, Maintenance, and Post-Installation Care
Having a plan for warranties and regular care makes homeowners feel secure after a window project. Read all the paperwork, remember who to contact, and keep records of payments and photos. Knowing what your warranty covers and who to call for repairs helps avoid surprises.
Manufacturer and installer warranties
Brands like Pella and Andersen usually offer a warranty on glass, seals, and frames. Installers also provide a warranty for their work. Check both to see if they cover glass breakage, hardware, and seal failure.
Find out who will handle claims. Some manufacturers cover parts, while installers handle labor. Make sure you know how long it takes to get a response and what you need to prove your claim.
Routine maintenance tips
Regular care helps your windows last longer and keeps your warranty valid. Clean frames and glass with mild soap, remove debris from tracks, and keep weep holes clear. Also, lubricate moving parts with silicone spray and check locks and hinges.
Check exterior caulking and re-seal gaps if you see cracks. Do seasonal checks for damaged seals and water signs to catch problems early. This helps with warranty claims if needed.
When to expect follow-up service
Installers usually do a post-installation check to make sure everything works right. They might come back later to fix small issues or gaps.
Warranty-covered problems have specific timelines in the warranty or installer policy. If you need a repair, report it quickly and follow the steps for a fast fix.
Conclusion
This summary covers the main steps for professional window installation services. Homeowners need to get accurate measurements and remove old windows carefully. Then, new windows are set and sealed with precision.
It’s important to hire professional installers in Canada. They follow best practices and ensure safety. This way, the home is respected throughout the process.
To get ready for window replacement, clear the work areas. Make sure you know the timeline and who is responsible for permits. Keeping in touch with the crew helps them work efficiently.
Choosing the right materials for an energy-efficient upgrade is key. It saves on heating costs and makes your home more comfortable. Get detailed quotes, check warranties, and schedule a follow-up inspection for satisfaction.
A well-planned window replacement project improves air quality and security. It also adds value to your home. Remember to follow maintenance tips and keep warranty info handy for a successful project.